What to know about changes to the campus VPN login
We are adding an additional layer of security to the VPN to protect the university. There have been a number of targeted attacks against higher education institutions where their VPN was used as a means for unauthorized access to systems and information.
There are two main changes to note:
- If you already use the Duo app for multi-factor authentication, you will begin using it to access the campus VPN as well. You will be prompted to authenticate each time you connect to the campus VPN.
- You will see fewer options in the drop-down menu.
Neither of these changes affect VPN functionality.
Logging in for the first time on or after March 12
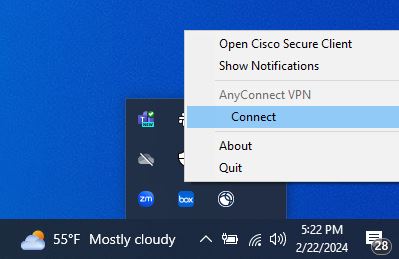
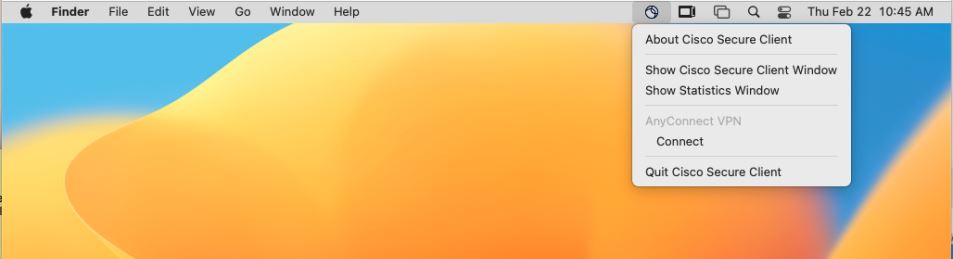
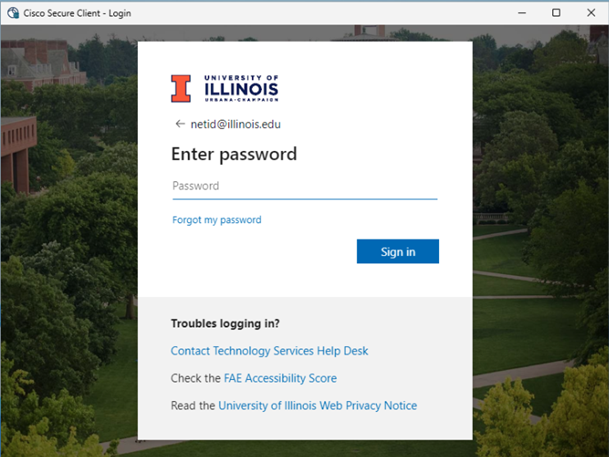
1. Open the Cisco Secure Client (formerly AnyConnect) app.
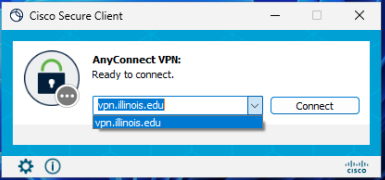
2. Type or select “vpn.illinois.edu” and click “Connect”.
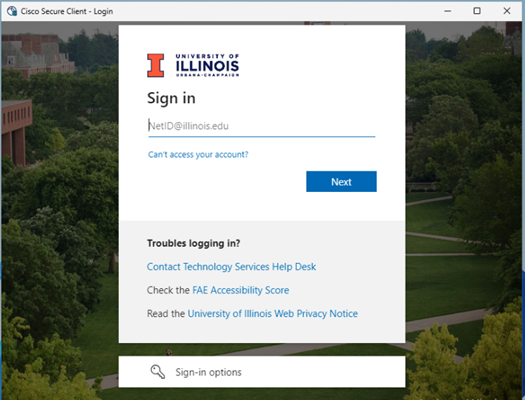
3. Enter your university email, followed by your password.
4. If you are NOT enrolled in Duo, you should connect to the campus VPN at this point.
5. If you use Duo to authenticate for other campus applications, you will be prompted to do so each time you access the campus VPN. Complete Duo authentication as you would with other applications.
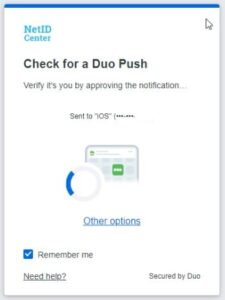
6. Once you authenticate with a passcode or push notification, you should be connected to the VPN.
NOTE: On your first login on or after March 12, you automatically will connect to the VPN with the Split Tunnel option by default. If you wish to use another option, just disconnect and reconnect.
On your second login and for all further logins, you can select from any option on the drop-down menu and click “Connect”.
How do I know which VPN option to choose?
| Your goal | Screenshot | Best VPN option |
|---|---|---|
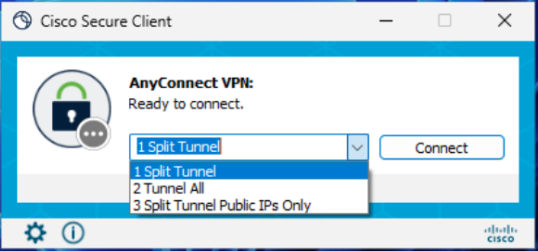
| If your only goal is to access campus resources |  | 1 Split Tunnel |
| If your goal is to access off-campus resources as if you are on-campus, select the “Tunnel All” profile. This will also allow you to access campus resources. | 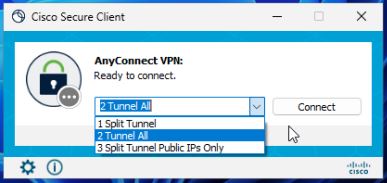 | 2 Tunnel All |
| If your goal is to access campus resources, but you are at a location that uses the same private IP space as Illinois, select the “Split Tunnel Public IPs Only” profile. (If you are not sure what this means, you can safely ignore this profile option.) | 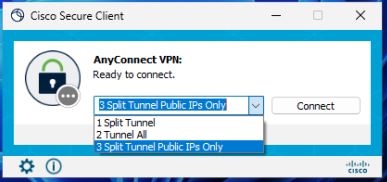 | 3 Split Tunnel Public IPs Only |
| If you are unsure which profile to choose, select the “Tunnel All” profile. | | 2 Tunnel All |
VPN Login FAQ
I have FOUR options on my AnyConnect VPN menu.
What is the fourth used for?
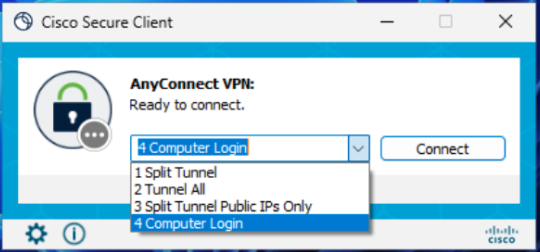
Computer Login should only be used in situations where you are attempting to connect to the VPN before logging in to your computer.
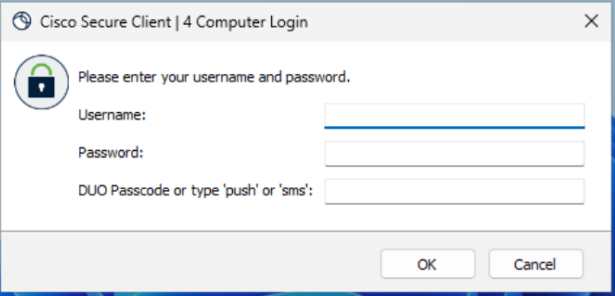
When you try to connect using the “Computer Login” profile, you will see a username prompt, a password prompt, and a Duo passcode prompt. Enter your NetID as your username and your campus password in the password prompt. In the Duo passcode prompt, enter the word “push”, “sms”, or your Duo one-time passcode.
I use the OpenConnect Client.
What steps should I follow?
If you are not sure what the OpenConnect client is, you can safely ignore this section.
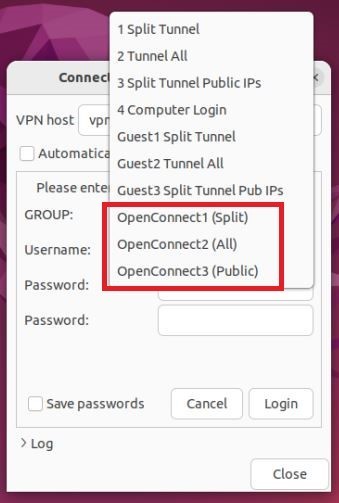
The login process for those who use the OpenConnect client, whether from the command line, a graphical desktop, or through NetworkManager, differs from the Cisco Secure Client process. Beginning on March 12, those who use the OpenConnect client will have to connect to specific VPN profiles that begin with the word “OpenConnect”.
- The VPN profile “OpenConnect1 (Split)” is the OpenConnect equivalent of the “Split Tunnel” profile.
- The VPN profile “OpenConnect2 (All)” is the equivalent of the “Tunnel All” profile.
- The VPN profile “OpenConnect3 (Public)” is the equivalent of the “Split Tunnel Public IPs Only” profile.
Open Connect with Graphical Interface
If you use OpenConnect through a graphical interface such as Ubuntu Network Manager, connecting to the VPN is a four-step process:
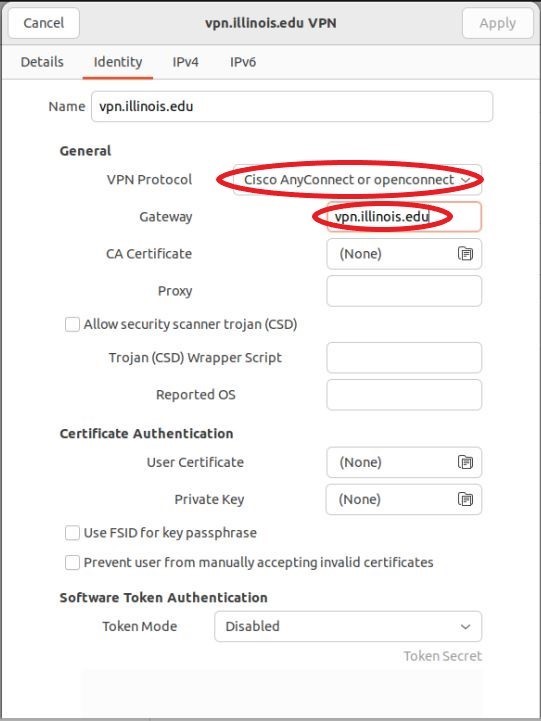
Configure your OpenConnect client to use the following settings then click “Apply”.
- VPN Protocol: Select “Cisco AnyConnect or openconnect”
- Gateway: vpn.illinois.edu
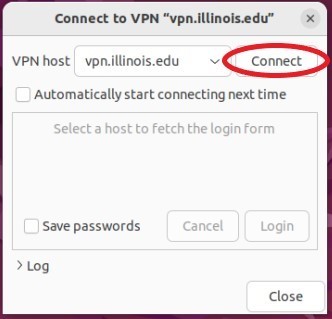
From the Network Manager interface, select the VPN you just configured and click “Connect”.
From the “GROUP” drop-down menu, select one of the “OpenConnect” options.
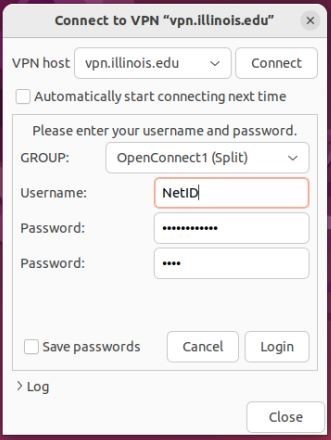
- In the “Username” prompt, enter your NetID.
- In the first password prompt, enter your campus password.
- In the second password prompt, enter the word “push”, “sms”, or a Duo one-time passcode. Then click “Connect”.
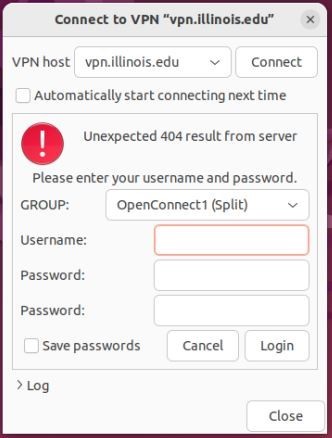
When you connect, you may see an error that says, “Unexpected 404 result from server.” This error is expected and can be safely ignored.
OpenConnect with Command-Line Interface
If you use OpenConnect from the command-line interface, connecting to the VPN is a three-step process:
- As the root user, invoke the openconnect command with the “-b” flag and “vpn.illinois.edu” as a positional argument:
openconnect –useragent=AnyConnect -qb vpn.illinois.edu
- When presented with a “GROUP” list, enter one of the following three options:
- “OpenConnect1 (Split)” for Split Tunnel
- “OpenConnect2 (All)” for Tunnel All
- “OpenConnect3 (Public)” for Split Tunnel Public IPs Only
- You will then be prompted for your username and two passwords. Use your NetID as your username and your campus password as the first password. In the second password prompt, enter the word “push”, “sms”, or your Duo one-time passcode.
When you are done using the VPN, you need to end the OpenConnect client process with a command such as “sudo pkill -SIGINT openconnect”.